Article by James Hawkins
This is the second part of our guide on Nmap, you can find the first part here, in this part of the tutorial we’ll see other configurations that you can use with Nmap to avoid firewalls or debug the information obtained.
Evading Firewalls
Firewall Evasion Techniques:
Firewall & IDS (Intrusion Detecting Systems) are designed to prevent port scanning tools, like NMAP, from getting an accurate amount of valuable information of the systems which they’re protecting. Well, we should not be worried of this to a certain extent, because nmap has many features which are designed specifically to circumvent these defenses.
Fragments Packets
The -f Option is used to fragment probes into 8-byte packets, This option causes the requested scan (including ping scans) to use tiny fragmented IP packets. The idea is to split up the TCP header over several packets to make it harder for packet filters, intrusion detection systems, and other annoyances to detect what you are doing.
syntax:
sudo nmap -f 192.168.1.34 |
Specify -f again to use 16 bytes per fragment (reducing the number of fragments). Or you can specify your own offset size with the --mtu option. Don´t also specify -f if you use --mtu.
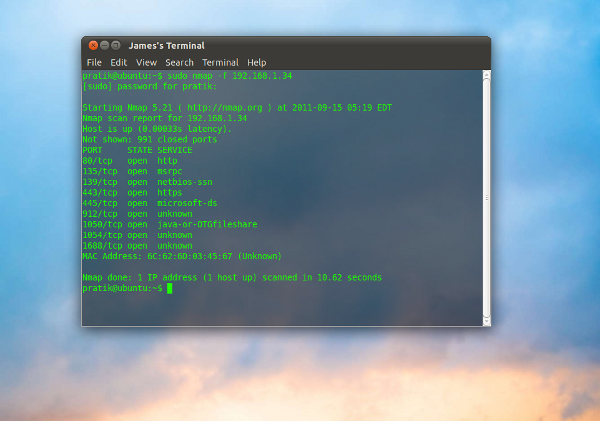
The -f option instructs nmap to send small packets of around 8 bytes, thus fragmenting the probes into tiny packets. This option isn’t particularly useful in everyday situation; however, it may be helpful when attempting to evade some older or improperly configured firewalls.
Using a Decoy
The -D option is used to mask a port scan by using one or more decoys ip address, which makes it appear to the remote host that the host(s) you specify as decoys are scanning the target network too.
Syntax used: nmap -D [decoy1, decoy2, decoy3, etc| RND:Number] [target’s IP add]
nmap -D 192.168.1.33 192.168.1.31 192.168.1.32 <strong>192.138.1.34</strong> |
In this example the bold ip address is the remote target’s ip address
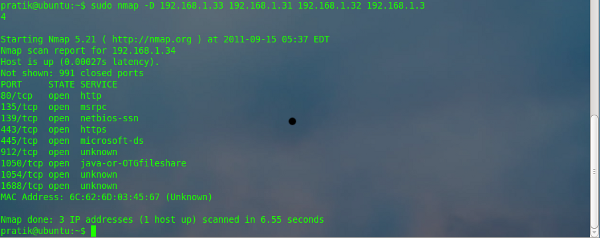
Also, while performing a decoy scan, Nmap will spoof additional packets from the specified number of decoy address. This effectively makes it appear that the target is being scanned by multiple systems simultaneously. Using decoys allow to the actual source ip to “blend into crowd” which makes it harder to trace.
Idle Zombie Scan
The -sI option is used to perform an idle scan.
This advanced scan method allows for a truly blind TCP port scan of the target (meaning no packets are sent to the target from your real IP address). Instead, a unique side-channel attack exploits predictable IP fragmentation ID sequence generation on the zombie host to glean information about the open ports on the target. IDS systems will display the scan as coming from the zombie machine you specify (which must be up and meet certain criteria).
For detailed information on this method look at http://nmap.org/book/idlescan.html
Syntax:
nmap -sI 192.168.1.1 192.168.1.34 |
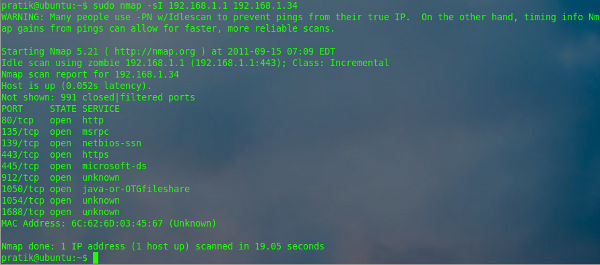
The zombie scan is a technique that allows attacker to exploit an idle system & use it to scan a target system for you. In this example 192.168.1.1 is the zombie, whereas 192.168.1.34 is the target system. The scan works by exploiting the predictable sequence ID generation employed by some systems. In order to make the idle scan successful, the zombie system should be truly idle at the time of scanning.
Note: As you can see in the screen shot, even nmap recommends to combine -PN with -sI, otherwise an initial ping packet will be sent to the target from your real IP, unless you use -PN with -sI.
Manually specify a source port number
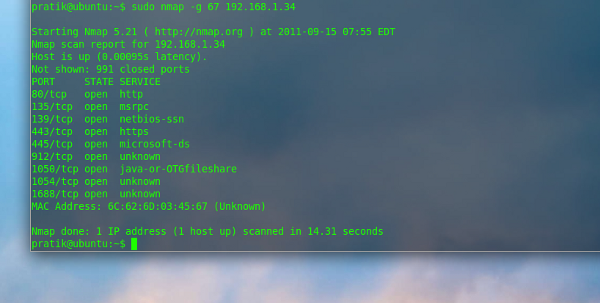
The –source-port option is used to manually specify the source port number of a probe
Syntax :
nmap –source-port 53 192.168.1.36 |

By default, nmap will randomly pick an available outgoing source port to probe a target. The -–source-port option will force nmap to use the specified port as the source for all packets. This technique can be used to exploit weakness in firewalls that are improperly configured to blindly accept incoming traffic based on a specific port number. Port 21 (FTP), port 53 (DNS) are common ports susceptible to this type of scan.
Note: The -g parameter is the same as the above –-source-port, in the below screenshot I have taken as source port the 67 (DHCP) and the ip address of the target is the 192.168.1.34
Randomizing target scan order
The –-randomize-hosts option is used to randomize the scanning order of the specified targets.
Syntax:
nmap – -randomize-hosts 192.168.1.1-100 |
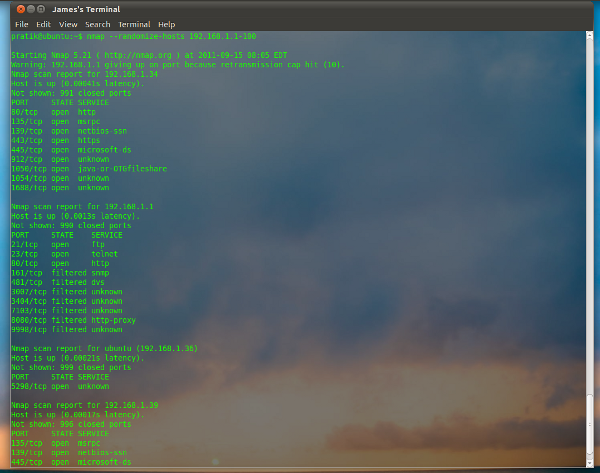
The
–-randomize-hosts |
options helps prevent the scans of multiple targets from being detected by firewalls and IDS. This is done by scanning them in a random order.
Spoofing Mac Address
The –spoof-mac is used to tell Nmap to spoof the MAC (Media Access Control) address of an ethernet device.
Syntax used:
nmap -sT -PN –spoof-mac apple 192.168.1.34 |
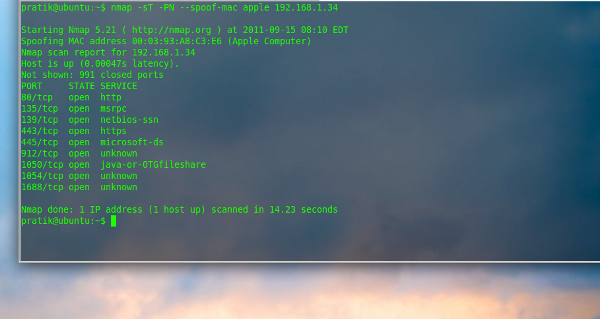
In this example above , nmap is instructed to create a random mac address of an Apple’s device, you can also give as input another vendor’s name (like dell, 3com etc) instead of apple.
Also it’s possible to tell nmap to generate a random mac address by using 0 (zero) as shown below.
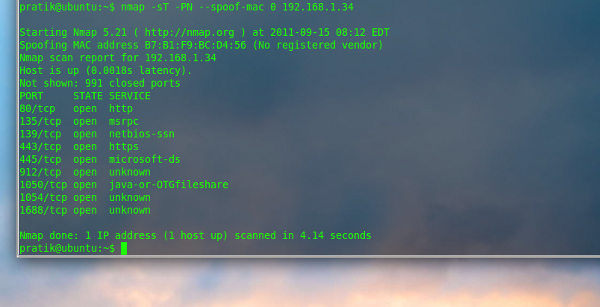
Here nmap has created a random MAC address: B7:B1:F9:BC:D4:56
Note: You can also specify a specific MAC address .
Output Options
Ever wondered how you can export your scan results in a notepad or an .xml file ? Well, nmap has this feature too, nmap offers several options for creating a formatted output, apart from simply displaying the scan results on your screen, you can also save the scan results in a text file, XML file or a single line grepable file (machine output)
Saving the output in .txt file
The -oN parameter saves the scan results in a plain text file, that we can give as parameter of this option.
Syntax:
nmap -oN maketxt 192.168.1.34 |
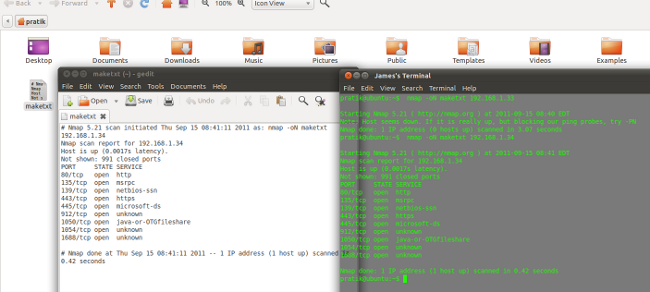
Here the text file is saved in the home folder, with name “maketxt”.
Saving the output in a XML file
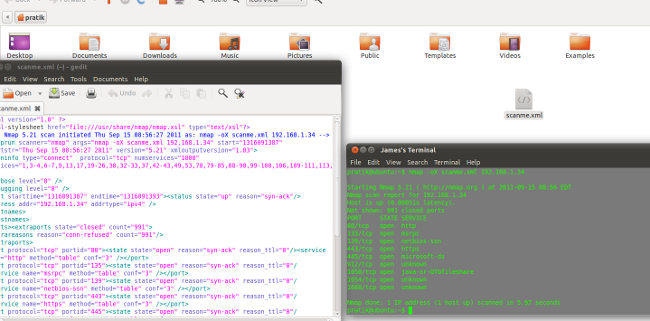
The -oX parameter is used to save the scan result in a XML file.
Syntax:
nmap -oX scanme.xml 192.168.1.34 |
133t Output (leet)
The -oS option enables “script kiddie” output
Let’s see it in action; parameter used is:
nmap -oS kiddiescan.txt 192.168.1.1 |
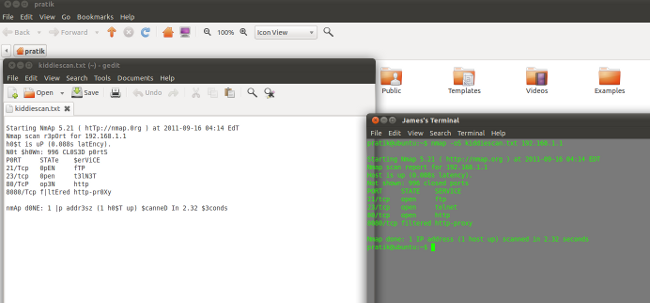
This option is included as a humour and it doesn’t really has any practical use, other than a good laugh, and some people might even find it hard to read it (As difficult as reading captcha)
Here, with the -oS option the output is saved in a text file, named kiddescan.txt
Basic Troubleshooting & Debugging Options.
While using nmap, you can find some technical issue, like other softwares, nmap isn’t an exception, it is not important that nmap will always show the output which you have expected, you ‘may’ get an error, or even worse you might not receive an output at all. Thus, to overcome these issues, Nmap has implemented several methods to trace & debug a scan which can actually help you identify the probable error.
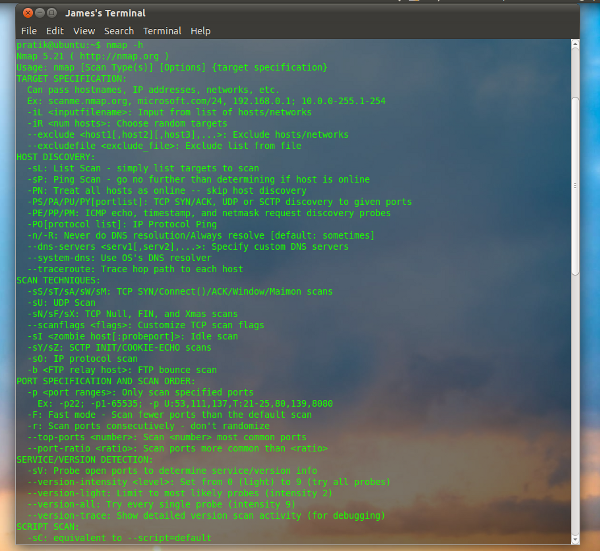
Executing nmap -h will show you a summary of available options
Syntax :
nmap -h |
Know you version of NMAP
The -V option in nmap is used to display the version of your nmap
Syntax :
nmap -V |
It is highly recommended that you use the latest and most updated version of nmap, NMAP being an Open Source program, it is rapidly debugged & fixed by the community members. visit nmap & make sure you’re using the latest updated version. This will ensure that you’re using a bug free version.
Verbose Output
The -v option is used to enable a verbose output
nmap -v 192.168.1.34 |
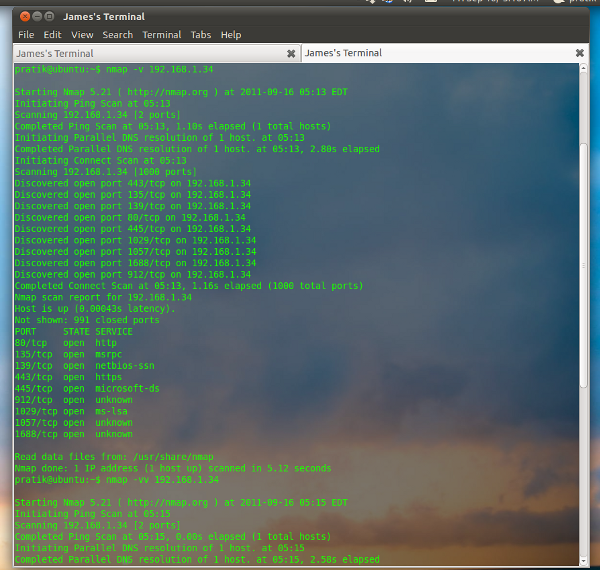
Verbose output can be very useful while troubleshooting connectivity issues
Note: You can use the -v Option twice (-vv) to make the output more verbose.
Debugging
The option -d enables debugging output.
Here, I have used
nmap -d 192.168.1.1 |
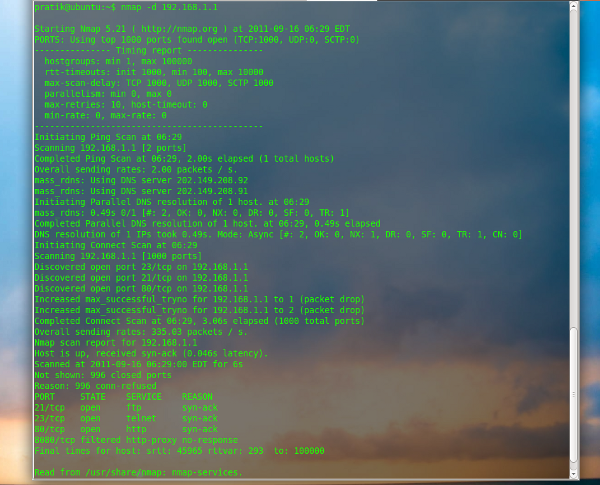
The debugging output provides additional information that can be used to trace a possible bug or to troubleshoot problems. The default -d option, outputs a fair amount of debugging information. One can also specify a debugging level from 1 to 9 with the -d parameter. d1 provides the lowest amount of debugging output while d9 provides the maximum. (nmap -d[1-9] 192.168.1.1).
And that’s all for my guide of the most common parameters of Nmap with examples, i hope you have learnt something useful of this awesome tool.
Popular Posts:
- None Found

[…] post: In depth Tutorial Part II – Linuxaria This entry was posted in Uncategorized and tagged avoid-firewalls, first, information, […]
[…] 1 e Parte 2 android arch linux computador debian fedora free software hacker hardware informatica linux […]
what if i want to scan all up hosts in my company
You can scan an entire subnet, can use wildcards also.
nmap 192.168.8.*
ornmap 192.168.8.1/24How to bypass the microtic? coz, i always blocked by the microtic when i scan the IP in a area network. Please give me the explanation 🙂