 It happens every now and then to have to do a complete cleaning of a system. Maybe you get a computer from an employee who is gone, or a server must be abandoned, or simply you need to reassign a computer and to be sure that all data are no longer readable in any way.
Do you think that a rm or formatting is enough?
Sorry, but if you think so i must say you are wrong, a rm a fdisk or something like that could be easily canceled, so you need something better…like DBAN
Darik’s Boot and Nuke (commonly known as DBAN) is an open source project hosted on SourceForge. The program is designed to securely erase a hard disk until data is permanently removed and no longer recoverable, which is achieved by overwriting the data with random numbers generated by Mersenne twister or ISAAC (a PRNG).
DBAN can be booted from a floppy disk, CD, DVD, or USB flash drive and it is based on Linux. It supports PATA (IDE), SCSI and SATA hard drives. DBAN can be configured to automatically wipe every hard disk that it sees on a system, making it very useful for unattended data destruction scenarios. DBAN exists for Intel x86 and PowerPC systems.
DBAN is a means of ensuring due diligence in computer recycling, a way of preventing identity theft if you want to sell a computer, and a good way to totally clean a Microsoft Windows installation of viruses and spyware. DBAN prevents or thoroughly hinders all known techniques of hard disk forensic analysis.
Instructions:
1. Turn on the computer that you would like to clean. Verify the computer is booting to
the CDROM drive before the HD, then insert the DBAN CD.
2. If you have booted correctly from the DBAN CD, then you will see the following screen.
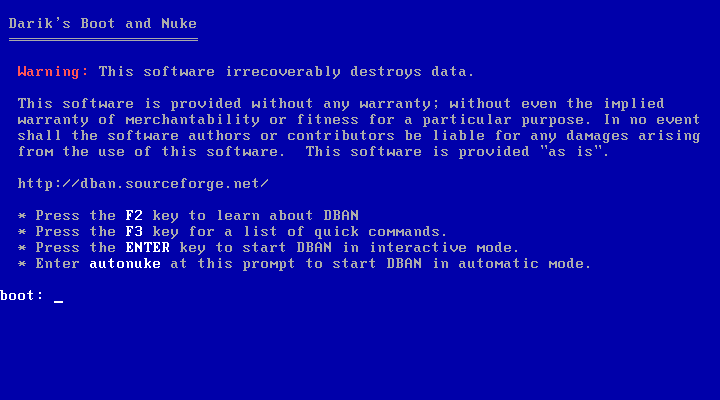
3. At the “boot: _” prompt, press the “ENTER” key to start DBAN in interactive mode.
4. After you press the “ENTER” key, you will see the following screen:
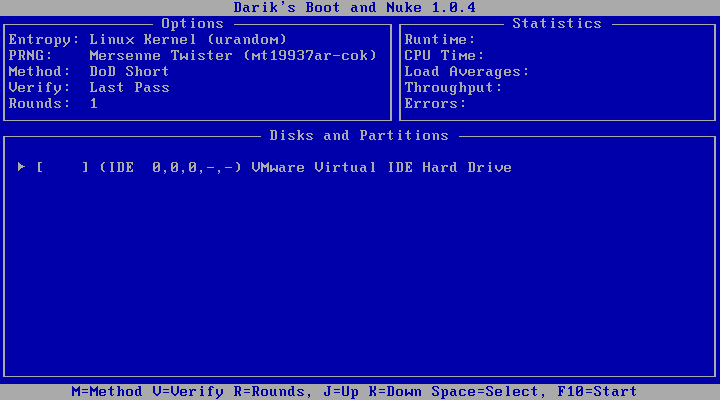
5. If your data is sensitive or contains important information, then please continue to
Step #6. However, if your data is NOT sensitive or does NOT contain important
information, then please keep ALL defaults and jump to Step #7.
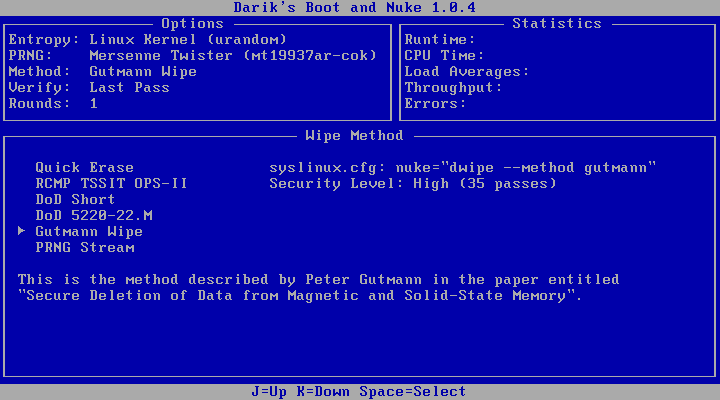
6. At the above screen, click the letter “M” for method and select “Gutmann Wipe” by
pressing “ENTER.” This method is recommended for sensitive data; “Gutmann’s
Wipe” will perform 35 passes to the hard drive. The image below will illustrate what
the screen should look like before you press the “ENTER” key.
7. Please verify your screen looks like the image below. *NOTE* Your screen may show a different “Method” than below depending on if you have secure data on your machine and changed the method above.
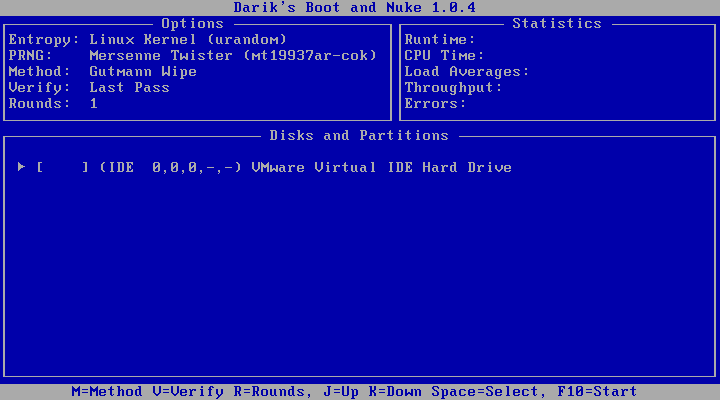
8. At this time, press the “Space” key. This will select your IDE drive that you would like to wipe clean. If you would like to choose a different drive to clean, then use your “Arrow” keys to select the drive and press the “Space” key to select the drive.
After selecting your drive, your screen should say “wipe.” Please refer to the screen below.
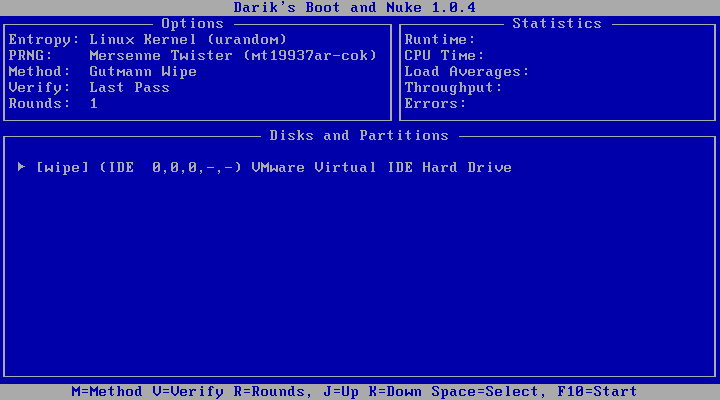
9. Since you just selected the disk that you wanted to wipe clean, now it is time to start the cleaning process. At this time press the “F10” key. This will start the “cleaning” process. Now your screen should look like the following image.
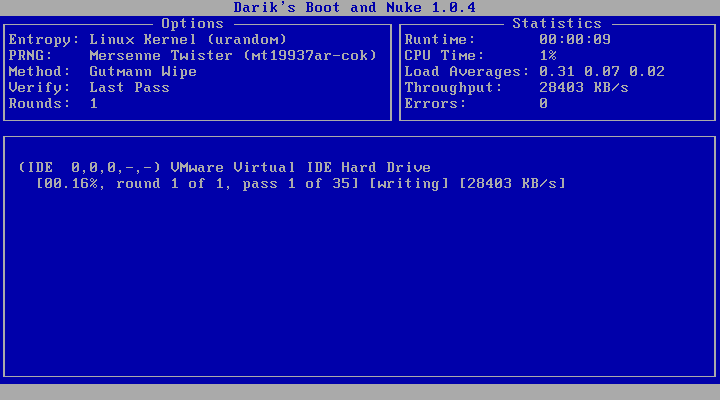
10. Both “DoD Short” and “Gutmann’s” process will take a while to finish. Plan on allocating at least 12 hours for this process.
11. That’s it!
References:
http://www.security.ku.edu/docs/doc-viewer.jsp?id=21
Popular Posts:
- None Found

Molto molto utile.
Grazie veramente.