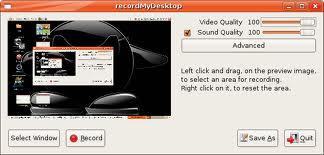
 Dopo aver letto l’articolo “How to create a screencast of your Linux desktop” ho iniziato a fare alcune prove di screencast con il programma recordmydesktop.
In particolare ho fatto dei test sia con l’interfaccia gtk che a linea di comando, ma purtroppo nelle prime prove non sono riuscito ad ottenere alcun suono all’interno del video.
Ma per prima cosa un piccolo passo indietro.
recordMyDesktop è un registratore della sessione del desktop per GNU/Linux che tenta di essere facile da usare, ma che ha anche come compito primario di essere efficace.
Come tale, il programma è diviso in due parti: un semplice strumento da riga di comando che esegue i compiti fondamentali della cattura e la codifica e un’interfaccia che espone le funzionalità del programma, in modo utile.
Lo strumento a riga di comando (che è essenzialmente recordMyDesktop), è scritto in C, mentre ci sono due frontend scritti in python con pygtk (gtk-recordMyDesktop) e PyQt4 (qt-recordMyDesktop).
Devo dire che usarlo è stato molto facile, salvo che per l’audio, per il quale non riuscivo ad ottenere nessun risultato.
Dopo qualche ricerca su google ho letto che il motivo più comune di questo problema è il setup del proprio mixer.
Ho allora iniziato a fare molte prove con alsamixer ed il mixer di xfce, ma devo dire tutte fallimentali, fino a quando non ho trovato un post sul forum di ubuntu che parlava di utilizzare pavucontrol.
Ho quindi installato pavuncontrol e semplicemente cambiando dalla sua schermata il dispositivo tutto ha preso a funzionare correttamente, come fare ?
Seguete questo cortissimo screencast.
Quindi, per farla breve:
- aptitude install pavuncontrol
- pavucontrol aperto da menu -> multimedia (o dove avete il programma)
- avviare un video di una canzone o qualsiasi cosa che utilizzi l’audio del computer
- lanciate recordmydesktop
- in pavucontrol andate nel tab “recording” e modificate il dispositivo associato a recordmydesktop.
- Tutto fatto.
Popular Posts:
- None Found

gtk-recordMyDesktop (records video + audio) and gnome-sound-recorder (records audio) can record both the system and the microphone sound. To choose the sound to be recorded open gnome-volume-control (from ALT+F2 for example), click on Hardware, then on Profile and there choose the corresponding option, depending on what will be recorded ..:
+ sound of the system: a) Analog Stereo Output; or b) Digital Stereo Duplex (IEC958)
+ sound from the microphone: a) Analog Stereo Duplex; or b) Digital Stereo (IEC958) Output + Analog Stereo Input
In gnome-volume-control, it may be necessary to choose “Off”, close it, open it again, choose the desired option and close it again.
Some of the other options may work sometimes, but they may record sometimes the system sound and sometimes the mic sound. And other options may record audio but could not permit to listen to the recorded sound. So it’s better not to use those options.
NB: system sound is the sound of what one can hear from the speaker. It can be a .ogg or .mp3, … song played by Totem, or a Flash music video of a web site, …
In Ubuntu I’ve tried xvidcap and gtk-recordMyDesktop. I’ve been able with both of them to record video and audio from the system or the microphone.
But gtk-recordMyDesktop has 2 problems:
a) When you click on stop it takes a lot of time to encode the video (in xvidcap you have it in the moment you stop the recording).
b) It uses a lot of space in a folder called more or less /tmp/rMD-session-xxxx. Sometimes is deleted after the encoding but sometimes not (keeps on growing) and you have to delete it before your Linux root partition (/) gets full.
In Ubuntu, to be able to record the sound with xvidcap you just need to follow a few steps:
http://ubuntuforums.org/showthread.php?t=1714139