
I was searching for lightweight collaboration suite (messaging and groupware) to manage some small websites and while searching around I found Citadel.
Citadel is a complete and feature-rich open source groupware platform.
- Email, calendaring/scheduling, address books
- Bulletin boards, mailing list server, instant messaging
- Multiple domain support
- An intuitive, attractive AJAX-style web interface
The Citadel system is extremely versatile. It provides numerous front ends to present to users, such as a text-based interface, an AJAX-style web interface, and many popular PIM clients using SMTP/POP/IMAP. All of these can be used simultaneously.
It’s also extremely scalable. Not only can a well-equipped Citadel server support a large number of concurrent users, but you can also build a distributed network of Citadel nodes that share rooms and their content.
Let’s see how to install and configure it on a Debian 7 “wheezy”, most of this guide it’s based on the great linode guide wrote for debian 6.
Verify your hostname
Before you begin installing and configuring the components described in this guide, please make sure you’ve followed our instructions for setting your hostname. Issue the following commands to make sure it is set properly:
hostname hostname -f |
The first command should show your short hostname, and the second should show your fully qualified domain name (FQDN), taking my website as example I should see
#hostname linuxaria #hostname -f linuxaria.com |
If you don’t see what you expect from your server you have to fix it.
Debian based systems use the file /etc/hostname to read the hostname of the computer at boot time and set it up using the init script /etc/init.d/hostname.sh
So you can edit the file /etc/hostname and put your FQDN (such as linuxaria.com) and then run:
/etc/init.d/hostname.sh start |
Steps:
1. sudo gedit /etc/hostname
2. Save the file with the hostname you like to set
3. sudo /etc/init.d/hostname.sh start
4. Verify the hostname in the file /etc/hosts
Repeat the tests with the commands hostname and hostname -f once you are satisfied of the result you need to do a reboot of the whole system, in this way the hostname will be setup properly at boot for all the processes.
Install Citadel
When installing new software with a lot of components I suggest to do an update of the whole system, so issue the following commands:
apt-get update

apt-get upgrade
Now you can issue the following commands to install the citadel-suite, spamassassin and amavisd-new packages:
apt-get install citadel-suite spamassassin amavisd-new |
The installation process will prompt you for several configuration items. Recommened answers for these prompts are as follows.
Please note: The HTTP and HTTPS port options are particularly important. If you have already installed a web server package such as Apache or nginx that will use ports 80 and 443, please do not specify these ports for your Citadel installation.
- Listen address – 0.0.0.0
- Authentication method – Internal
- Citadel administrator username – Not admin, for security use an alternate username
- Citadel Administrator Password – Something safe, usual rule to generate a safe password should be used
- Integration with Apache webservers – Internal
- Webcit HTTP port – 80 if you are not running another web server, 8080 otherwise
- Webcit HTTPS port – 443 if you are not running another web server, 4343 otherwise
- Limit Webcit’s login language selection – User Defined (or just choose a language if your users are all from a specific language)
If you need to reconfigure any of these options later, you can use the following command:
/usr/lib/citadel-server/setup |
Check the file /etc/default/webcit to make sure the installer correctly set your desired HTTP and HTTPS ports. You may need to update the following lines:
File excerpt:/etc/default/webcit
export WEBCIT_HTTPS_PORT='4343' export WEBCIT_HTTP_PORT='8080' |
In my case they were at the standard value (80 and 443) while I put different values on the wizard, so double check this.
Finally, edit the /etc/mailname file to reflect your system’s fully qualified domain name:
File:/etc/mailname
linuxaria.com |
Enable Spamassassin Filtering
You’ll need to edit the SpamAssassin configuration file to enable spamd:
File excerpt:/etc/default/spamassassin
# Cambiare ad 1 per abilitare spamd ENABLED=1 |
Start the spamassassin service as follows:
/etc/init.d/spamassassin start |
Please note that you’ll finish enabling SpamAssassin support within Citadel later
Configure SSL
Issue the following commands to back up the default Citadel SSL files.
cd /etc/ssl/citadel mkdir backup mv citadel* backup |
Self-Signed Certificate Instructions
Issue the following commands to generate a key and certificate signing request.
openssl req -new -nodes -newkey rsa:4096 -days 365 -keyout citadel.key -out citadel.csr chmod 600 citadel.key |
As part of this process, you will be prompted to enter several values, as shown below. Please take special care to specify your server’s fully qualified domain name for the “Common Name” setting.
Country Name (2 letter code) [AU]:US State or Province Name (full name) [Some-State]:New Jersey Locality Name (eg, city) []:Galloway Organization Name (eg, company) [Internet Widgits Pty Ltd]:Linuxaria Organizational Unit Name (eg, section) []: Common Name (eg, YOUR name) []:linuxaria.com Email Address []:support@linuxaria.com Please enter the following 'extra' attributes to be sent with your certificate request A challenge password []: An optional company name []: |
Issue the following command to create a self-signed certificate and copy required files to the webcit directory:
openssl x509 -req -days 1000 -in citadel.csr -signkey citadel.key -out citadel.cer cp -a citadel* /etc/ssl/webcit/ |
Running Citadel
Customize the logon banner for your Citadel server by editing the /etc/citadel/messages/hello file:
File:/etc/citadel/messages/hello
Welcome to ^humannode! This logon banner resides in ^bbsdir/hello -- please customize it for your site. |
Issue the following commands to initialize Citadel.
/etc/init.d/citadel restart /etc/init.d/webcit start |
Visit the web interface in your web browser. Using our preceding example, the Web address to visit would resemble the following URL (append “:4343” if necessary):
https://linuxaria.com:4343
You should see something similar to this:
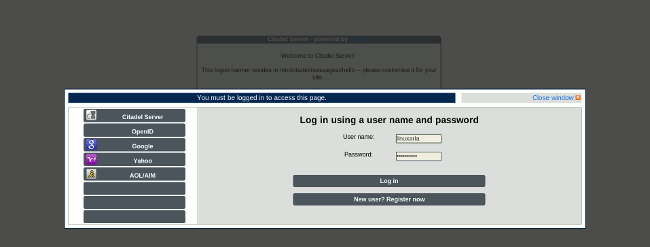
And once you have used your admin username and password you should see the welcome page:
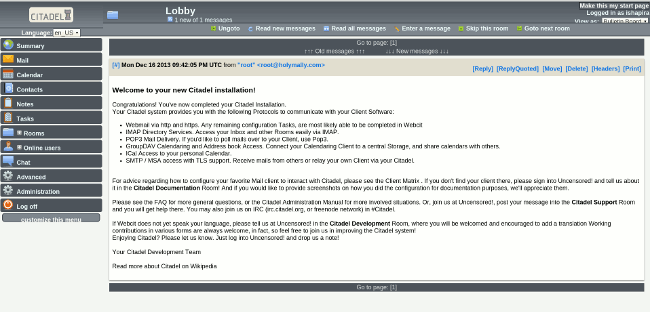
At this point, your email system should be fully functional and can be configured through the web interface. To finish enabling SpamAssassin support, select “Administration” in the control panel. Next, click “Domain names and Internet mail configuration”. Enter “127.0.0.1” in the box for the SpamAssassin host.
Lost Password Recovery
If you lose the password to your administrator account, issue the following command:
/usr/lib/citadel-server/setup |
When prompted for administrative account information, specify a new username and password. You may accept all other default settings. You should be able to log in as the new admin user. You may then reset the password for your original administrator account. After this is done, log back in as the original administrator and delete the temporary admin account.
Popular Posts:
- None Found
![]()
[…] How to install Citadel collaboration suite on Debian 7 […]
So happy to hear that you’re enjoying Citadel! Spread the word!
Hello Linuxaria.
You are a master of all universe for putting this on line.
I was looking for a way to install it and you did it.
So thanks a lot.
Just one thing beside. I used aptitude instead, to solve the karmic problem of exim4.
It does it automatically. Cool.
Marc.
Thanks a lot !