Article by Alessio bash, first published on his blog
Many security policies require you to change the port number of the SSH service to ensure greater security in a Linux system. Situation now used throughout the IT world and used mostly by users who have their own private server. Today I want to show you how to add another security layer without having to change the SSH port. To do this we’ll incorporate the famous Google Authenticator to our ssh service, in this way we’ll have a safe, two steps security, by entering our password and the combination given from the GA application. Let’s see how to do this…
The first step is to configure NTP on our Linux OS to have our time aligned with the Google servers.
Then download the application Google Authenticator for your mobile device:
Now get ready to install it on our Linux system.
As first step install the dependencies to be able to use the product correctly:
For Debian/Ubuntu
# apt-get install build-essential libpam0g-dev libpam0g make
For CentOS\RHEL (you must have enabled EPEL repo as described HERE)
# yum --enablerepo=epel install gcc gcc++ pam-devel subversion python-devel git
For ArchLinux (if necessary)
# pacman -Sy pam wget
Now complete the installation of dependencies with the compilation of the required library. Download the library with the command:
# wget https://google-authenticator.googlecode.com/files/libpam-google-authenticator-1.0-source.tar.bz2 -O googleauth.tar.bz2
extract the contents:
# tar -xf googleauth.tar.bz2
enter into the new directory:
# cd libpam-google-authenticator-1.0/
Edit the makefile with your favorite editor:
# nano Makefile
And here add, immediately after the directive ”VERSION := 1.0“, the row “LDFLAGS=”-lpam“”:
...
VERSION := 1.0
LDFLAGS="-lpam"
...
At this point, save the file and launch the build commands:
# make && make install
If the installation is successful you can remove the downloaded files with commands:
# cd ..
# rm -rf googleauth.tar.bz2 libpam-google-authenticator-1.0/
At this point we can run the following command for the first configuration of the software:
# google-authenticator
you will be prompted with the following question:
Do you want authentication tokens to be time-based (y/n)
reply “y” and press Enter.
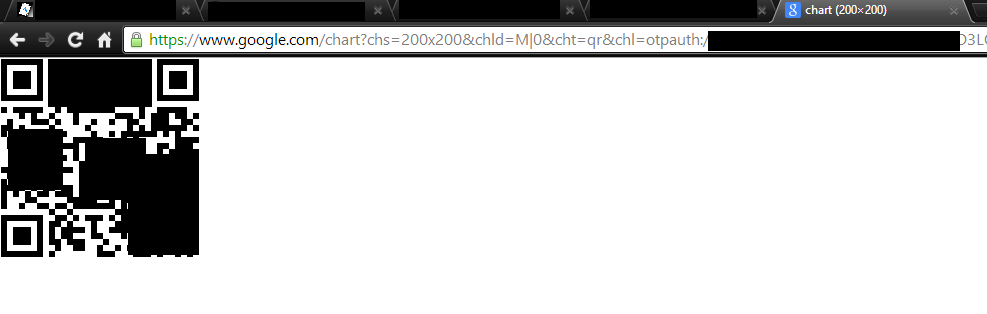
At this point you will see a output like this:
https://www.google.com/chart?chs=200x200&chld=M|0&cht=qr&chl=otpauth://totp/root@myserver%3Fsecret%3D3LXXXXXXXXXXXX
 Your new secret key is: 3LOXXXXXXXXXXXX
 Your verification code is 722511
 Your emergency scratch codes are:
 83222658
 89225401
 50442214
 61802255
 22629775
Do you want me to update your "/root/.google_authenticator" file (y/n)
copy the link: https://www.google.com/chart?chs=200×200&…. and paste it in the address bar of your browser, in this way you should see a qrcode.
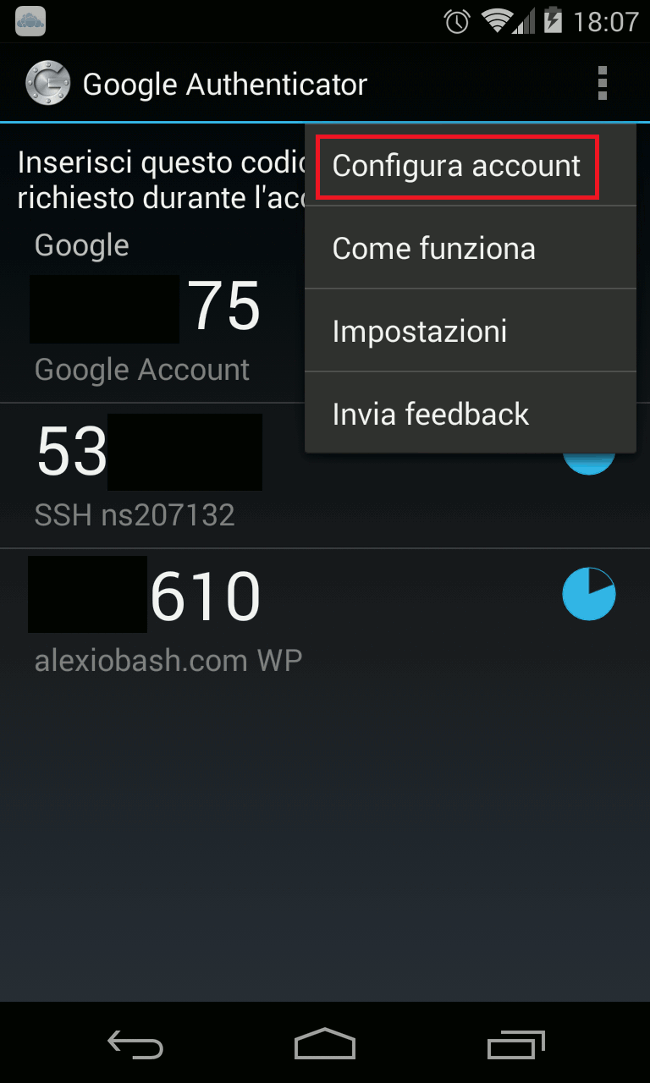
 Open the G.A. application on your mobile device, and go on ”Menu” -> “Configure Account”
Now tap on ”Read barcode”
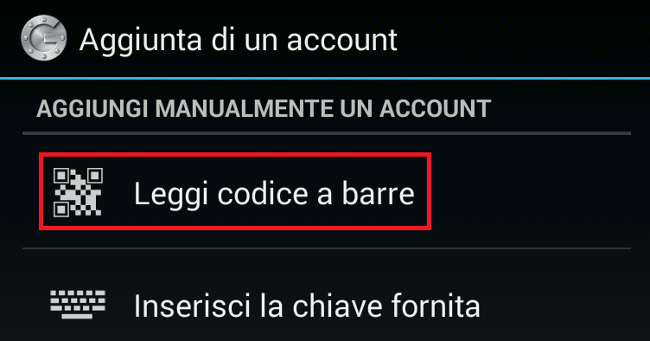
Now, place the smartphone on the screen to read the bar code and generate the access codes.
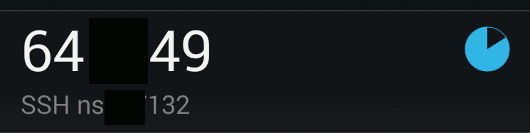
It will appears immediately after the entry for your server (eg: root@hostname):
The application is ready, we go back on our Linux system and continue the configuration. We left the question:
Do you want me to update your "/root/.google_authenticator" file (y/n)
reply “y” to this and the other questions.
There is nothing left to do but to edit the pam configuration file with your favorite editor:
# nano /etc/pam.d/sshd
and add at the end of the file:
auth required pam_google_authenticator.so
save and change the sshd_config configuration file :
# nano /etc/ssh/sshd_config
you must change the item :
ChallengeResponseAuthentication no
to
ChallengeResponseAuthentication yes
save and restart the sshd service with the command:
For Debian/Ubuntu
# service ssh restart
For RHEL/CentOS
# service sshd restart
For ArchLinux
# systemctl restart sshd
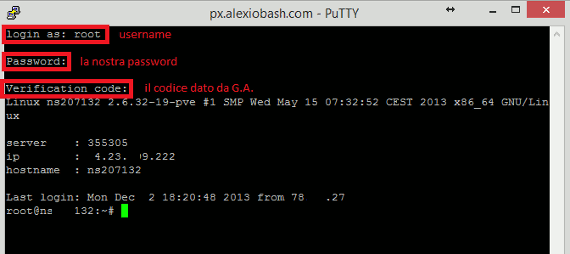
At this point, we can test the solution by connecting to the server through ssh:
To enable the same code on other users of the system just copy the file /root/.google_authenticator in the user’s home. While if you want a token for each user just relaunch the command google-authenticator with the desired user.
Popular Posts:
- None Found
![]()
I love the idea behind this tutorial. Hopefully will get to play with it at some stage 🙂